Return to Main Menu ![]()
Fencing
Timber
Sheds
Decking
Composite
Gates
Garden Accessories
Arbours & Seats
Return to Category Menu ![]()
Border & Deck Fence Panels
Concrete Posts & Gravel Boards
Contemporary Range
Decorative Screening
DuraPost®
DuraPost® Urban Composite Panels
DuraPost® Vento Composite Panels
European Panels
European Lattice
Paints, Stains & Preservatives
Paling/Traditional Panels
Postcrete, Accessories & Fixings
Fencing Accessories
Screws, Nails and Fixings
Traditional Trellis
DuraPost® Sleek Aluminium Panels
Post Support Spikes & Bolt Downs
DuraPost® Vista
European Gates
View all
Return to Category Menu ![]()
Return to Category Menu ![]()
Return to Category Menu ![]()
Return to Category Menu ![]()
Return to Category Menu ![]()
Return to Category Menu ![]()
Return to Category Menu ![]()
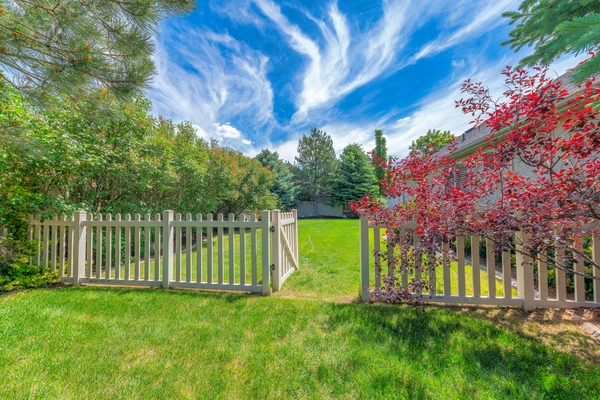
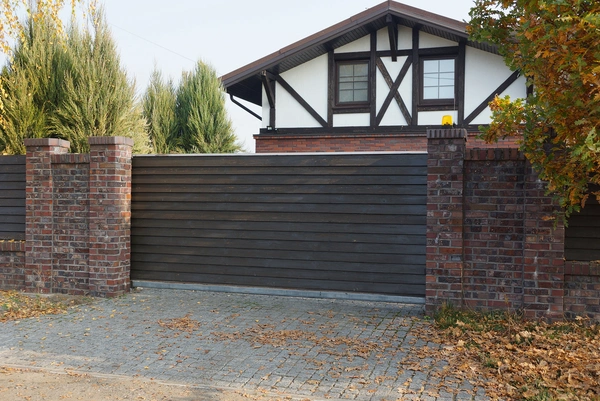
A broken-down gate just makes your house look old. But a well-maintained gate can increase the value of your home. If you are looking to upgrade your home with a gate that will add style and privacy, then this is the article for you.
A good garden gate will be more than just a functional feature attached to your fence. A good garden gate will keep your home protected from unwanted visitors as well as add a modern and stylish look to your home.
How To Build A Garden Gate
Building a wooden gate for your home may seem like a daunting task. But with the right tools, materials, and guidance, anything is possible. A garden gate is certainly within reach for the majority of DIY enthusiasts.
In this step-by-step guide, we are going to take you through the tools and materials you need to buy, as well as detailed instructions on how to assemble and hang your gate all by yourself.
By the end of this guide, you will be able to take some bits of timber and create a perfect gate to add style and value to your home.
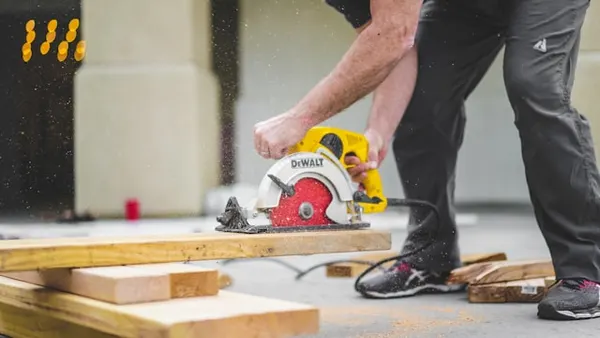
What tools do you need to build your gate?
The first step you need to take before beginning to construct your gate is to make sure you have all the required tools to help you finish the job.
You will need:
- Hammer
- Power drill or screwdriver
- Power saw
- Spirit level
- Tape Measure
- Pencil
What materials do you need to build your gate?
Once you have all the required tools to build your gate, the next step is to make sure you have all the right materials. The type and size of the wood are completely up to you, but the process remains the same no matter the size.
Step 1: Install your gate supports
If you already have a pre-built fence where your gate is going, make sure the fence posts can support a gate. The size of the gate should not be greater than 4” (1.22 m) in width. If it is wider, you will need to make 2 gates that can meet in the middle.
If you're attaching your gate to a wall, we recommend screwing a 2x4 into the wall and attaching your gate to the wood rather than directly into the brickwork, as this will likely weaken over time, leading to the need for another gate shortly after.
Step 2 - Measure the gap
The frame for your gate is the first thing you will need to build, so it's important you know the exact size of the gap between both posts or walls.
Make sure you have accurate measurements before starting to build your garden gate. Make sure you know the exact height and width of your gate. It’s also important to consider the purpose of the gate: whether it is for cars to get through or simply for a small pathway.

Make sure you measure twice and cut once. As you don’t want to go back out for more materials halfway through the build. We also recommend leaving around 10 mm on either side of your gate to allow for smooth movement of the gate and also allow it to expand and shrink depending on the weather.
Step 3 - Cut out your frame
The first major step in building your wooden gate is to cut out the frame; the frame can be whatever size and shape you want. But this will be used to attach all the wooden fence pickets too.
You will need two 2x4s (a top and bottom one). Cut both the same size, 10 mm shorter than the narrowest distance between the fence posts where you will be installing the gate.
Once they are cut to length, position them on a flat surface. You can either use the ground or a bench. You’ll want to position them approximately the same distance from each other as the rails on the fence, but this will be determined by the type of gate you are making.
Finally, make sure your square frame is straight, and then you are ready to start screwing them together. To do this measure from the top bend to the opposite bottom corner. Both sides should measure the same.
Screw in the top and bottom planks. Drill a pilot hole for the screws before inserting them to prevent splitting the wood. Fasten with deck screws. We recommend using 2 screws on each side; this will make sure your gate stays strong for years to come.
Step 4 - Attach the diagonal support
Once you have all 4 sides correctly attached, the next step involves adding diagonal support to your fence; this will stop it from bending or warping from the weight.
You will need to cut an angled cross-brace and attach it to the top and bottom rails. Connect these to the frame boards that match the rest of the fence by using deck screws, pre-drilling as before.
You will need to create diagonal cuts within the wood so that it can fit within the frame you have built. You can then screw in your nails from the side of the crossbeam into your frame.
Step 5 - Cut and install your wooden slats
Now that you have a frame for your fence, you can add the wooden slats to the front of your gate. Each one can be cut to a desired length, depending on where you will be installing your gate. From there, start at one side and leave a ⅛ inch between the planks for weather allowances.
You can cut and change the height of your wooden slats at the top to create a pattern that will make your garden gate more stylish than a standard 4x4 gate. Generally, a bevelled edge is very popular. Then you can screw each of your wooden slats into the form both at the top and the bottom, using 2 screws.
The last gate board will probably need to be cut to fit. This is normal. Use a circular saw or table saw to cut the board to size so there is about a 1/2 inch gap between the last gate picket and the first fence picket.
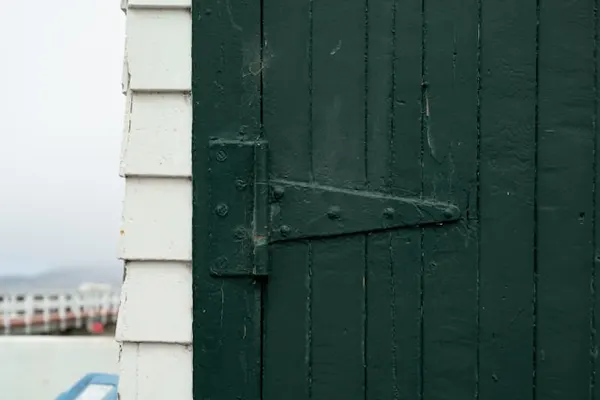
Step 6 - Attach your hinges
Position the hingesso that the centre of the pivot point is just hanging off the edge of the fence. Put the gate into place, supporting it on the bottom with a 2x4 (1.5 inches off the ground). Use a pencil to mark the location of the hinge on the post, and then lower the gate.
Predrill where the screws will go. Prop up the gate and screw the hinges into the gate, and attach the hinges to the post.
Step 7 - Attach your latch.
Install the gate latch about 2/3 of the way up the fence. You can mount it lower or higher if you want as well, but 2/3 is typical. The gate latch comes with the lag screws to attach it. Make sure to predrill the holes with a 3/16″ drill bit to avoid splitting the wood while inserting the lag screws.
Start by installing the latching mechanism first, then attach the latch to the gate. If you’re unsure how to do this, I highly recommend watching the video at the top of this page.
And finally, install a gate handle to make opening your new gate easy. You can put one on the other side as well. Positioning the handle as I show in the picture makes it easy to open the gate with one hand with one simple motion.
Step 8 - Seal the wood
Try to hit every exposed surface with your sealer, using a paintbrush or garden sprayer to apply. Most home retailers sell pads that are a sponge on a stick that you can use to spread it around, if necessary.
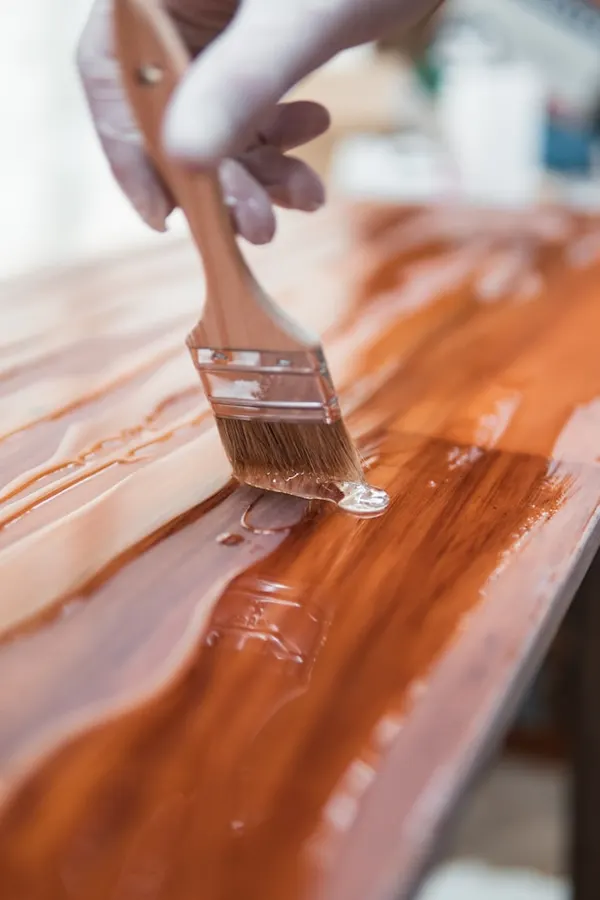
Try to cover the whole surface evenly, making sure you hit the bottoms of the planks, which tend to absorb more water than the face grains. This is the area most likely to rot or become discoloured. Let dry for a couple of hours in dry climates or a day in more humid climates.
What is the best place to buy gate materials?
The best place to buy all the materials you will need to build your gate from scratch is right here at Hillsborough Fencing. We have a wide range of timber available for you to buy and create the right garden gate for your home.
If you don’t fancy making your own, take a look at our pre-made gates. These can be made to fit any space you require.
How long does it take to build a wooden fence gate?
Following the step-by-step guide we have given you above, depending on experience and the tools used. A smaller garden gate could be built in a few hours. However, the bigger the gate or the slower the tools, might add extra time to it. But no gate should take longer than a day to build.
How much does it cost to build a gate?
There is no doubt that building a gate from scratch could be cheaper than buying one. But it all depends on the finish you want on your gate. Most materials can be bought for around £30-£50. After that, you have your tools and paints. That could quite easily increase the cost.
How can I prevent my gate from sagging?
The key to preventing your gate from sagging is to install a diagonal brace and use exterior wood screws instead of nails to assemble your gate.
Please wait, processing details.