Return to Main Menu ![]()
Fencing
Timber
Sheds
Decking
Composite
Gates
Garden Accessories
Arbours & Seats
Return to Category Menu ![]()
Border & Deck Fence Panels
Concrete Posts & Gravel Boards
Contemporary Range
Decorative Screening
DuraPost®
DuraPost® Urban Composite Panels
DuraPost® Vento Composite Panels
European Panels
European Lattice
Paints, Stains & Preservatives
Paling/Traditional Panels
Postcrete, Accessories & Fixings
Fencing Accessories
Screws, Nails and Fixings
Traditional Trellis
DuraPost® Sleek Aluminium Panels
Post Support Spikes & Bolt Downs
DuraPost® Vista
European Gates
View all
Return to Category Menu ![]()
Return to Category Menu ![]()
Return to Category Menu ![]()
Return to Category Menu ![]()
Return to Category Menu ![]()
Return to Category Menu ![]()
Return to Category Menu ![]()
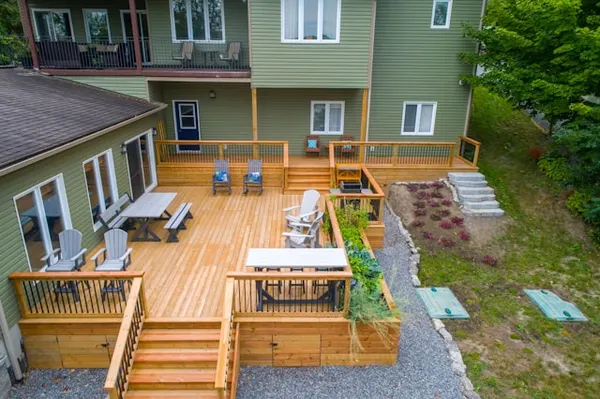
A stylish new deck not only enhances your home living experience, it can also add value to your property, creating a smart, inviting space to unwind and relax in. Therefore, it's no surprise that new composite decking is a top-of-the-list outdoor improvement project for many homeowners.
So, you’re interested in using composite decking for your deck build thanks to its low-maintenance, high-performance material composition, but where to start with installation? Don’t worry, this guide will help you install the same in your garden.
Why Choose Composite Decking?
Before you begin installing composite decking, it's important to understand why it’s a great choice for your outdoor space. Compared to traditional wood decking, composite boards are:
- Low maintenance – No need for staining or sealing.
- Durable – Resistant to rot, mould, and insects.
- Eco-friendly – Often made from recycled materials.
- Aesthetically pleasing – Available in a variety of colours and textures.
Now that you know why composite decking is an excellent option, let’s go through the steps to install it correctly.
Tools You’ll Need to Install Composite Decking
The following tools will help you with a quality installation:
Circular saw with an aluminium or laminate multipurpose blade
- Mitre saw
- Jig saw
- Hand drill
- 3mm and countersink drill bits
- Tape measure
- Set square
- String line
- Spirit level
- PPE
- Pencil
How to Lay Composite Decking at Home?
Before starting the process, make sure you have everything that is mentioned above. Also, ensure that the area is levelled and ready for construction. So, below are the steps you need to know.
1. Installing Your Substructure
First, make sure you have a secure frame or substructure. The joists should be fixed to a secure post with adequate spacing (typically less than 400mm) and should be in at least three places. This ensures that you have even load distribution and more points of support.
2. Get the Layout Right
We recommend that you lay the boards perpendicular (where two surfaces meet at a 90-degree angle) to the direction of the sub-frame, building line, door or view point. Not only does it look great with this technique, but it’s more stable and prevents issues like warping.
3. Fix the Starter Clips
Once you have decided where your first board will be laid, you should align the starter clip to the end and centre of the joist. Next, pre-drill a hole and then secure the clip into place. You can now install the rest of the starter clips, using a string line for more precision.
4. Install the First Board
Next, take the decking board and, using the grooves (you will see them on the side of the board), slide it into the starter clips.
5. Install the t-Slips
It’s time to install the t-clips, and you can use the hidden ones for a more seamless finish. Starting on one side of the board, slide the t-clip into the groove and then, part-screw the t-clip into the joist. It’s important not to secure them fully at this stage. Using the same steps, install the remaining t-clips into the joists.
6. Install the Locking Clip
Locking clips will secure the board to the substructure. It’s best to install one locking clip where the board hits the subframe, making sure it’s in the centre.
7. Install Your Second Board
Moving onto your second board, slide it into the t-clips fixings that you installed earlier. Going back to step five, install a new row of t-clips on the second board.
8. Fasten the t-Clips
It’s time to go back to the first board and fully secure the t-clips that you part-screwed.
9. Install the Rest of the Boards
Following the steps above, you can now install the rest of the decking boards.
10. Laying Boards end-to-end
If you are laying the boards end-to-end, it’s best to leave a 2-3mm gap between them to help with its natural movement, and to prevent uneven surfaces in the long term.
11. Breaker Boards
You may instead choose to install breaker boards to break up the decking area and add variety to the pattern. To do this, you can fasten them with t-clips or starter clips. Simply, cut one side of the T-clip off or install the starter clips in the same way you did earlier.
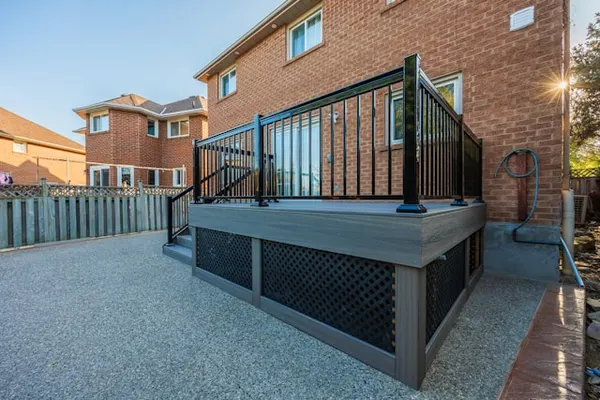
12. Installing Fascia Boards
Fascia boards are great to finish the look because they cover the edges and ends of the decking. To secure them, line up the boards with the top edge of the decking. You can then use colour coded screws to fix it into the joists.
13. Installing Angle Trim
You can also use angle trim to conceal corners and edges. You can cover the exposed areas with leftover decking boards, and then join the angle trim to the top edge of the board using colour coded screws or poly pins.
While these steps may seem comprehensive, installing composite decking is simple, and once you lay the first board, you will get the hang of it pretty quickly.
Some Reasons You Should Always Choose Composite Decking
The main issue with most traditional real wood decks is that they're vulnerable to the effects of weathering, warping, damage and decay. Authentic decks also require a lot of work to keep them looking their best. This is where composite decking comes in. Below are some reasons you should always consider composite decking.
- Highly Durable and Weatherproof
- Incredibly Realistic Wood-Effect
- Superior Versatility
- A Range of Colours to Choose from
- Easy Installation Process
- Virtually Maintenance-Free
- Safe Underfoot
- Eco-friendly
- Some Tips for Installing Composite Decking
- Make sure you have the right tools for the job
- Ensure you have a sturdy substructure
- Protect your Substructure with Joist Tape
- Considerations Before Installing Composite Deck Boards
It’s Time to Transport Your Space with Composite Decking
With proper installation, composite decking can completely transform your outdoor area. Whether you’re creating a stylish garden patio or a relaxing decking space, this durable and low-maintenance option is a great investment.
At Hillsborough Fencing, we offer premium-quality composite decking that is stylish, durable, and easy to install. Browse our range of decking boards today and start your DIY decking project with confidence!
Please wait, processing details.